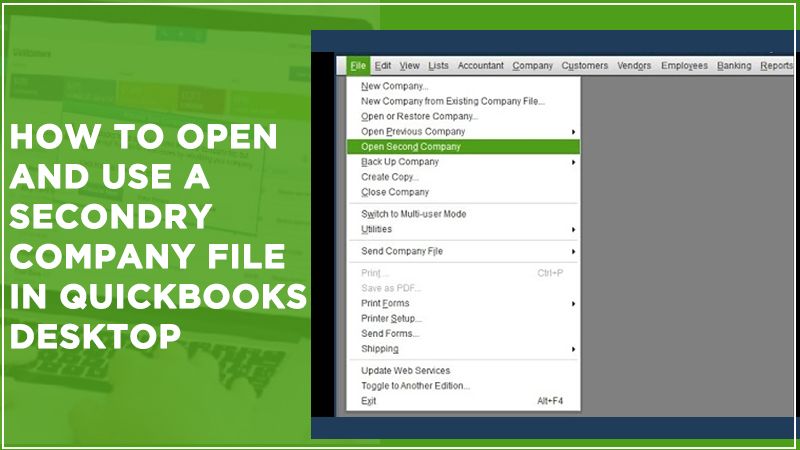
If you want to open and use a secondary company file on the QuickBooks desktop so you will be required to set up the multi-user mode. It will let you install and use the same company file at the same time over a network. You can sync and access the company file from the main system to the secondary device.
Sometimes you wish to sync files between the two systems then you must connect both of them to the same network and ensure that you have set the right installation options. You can do it with the help of the following steps from QuickBooks support:
- Open the downloaded file or insert the CD to install QB
- Follow the instructions shown on the screen and accept the software license agreement and click on Next
- Fill in the product and license numbers and click on ‘next’
- Click on ‘I’ll be using QuickBooks desktop on this computer and I’ll be storing’ option
- Follow the instructions that you see on the screen and finish the installation process
This doesn’t help you then there is nothing to worry about. Because you can proceed with the steps that QuickBooks support will be sharing with you to open your secondary company file.
Step 1- Set up QB Desktop for open and use a secondary company file
One system hosts the company files on a multi-user network which is your server system. Computers that connect to the network that don’t host the company files are known as ‘work stations’. And You can use these steps from QuickBooks Support to download and install QB desktop on the system:
- Click on ‘Custom and Network install’ for the install type
- Choose ‘I’ll be using QuickBooks Desktop on this computer, AND I’ll be storing’ if you want the complete version of QuickBooks Desktop on your server computer.
- If you just wish your server computer to host your files then click on ‘I will NOT be using QuickBooks Desktop on this computer
- Follow the instructions on the screen to finish the install.
We suggest you keep your company files on your server computer’s local hard drive because as it makes it easier to share them over your network.
Read More:- How to Repair QuickBooks Company File? Complete Guide
Step 2- Set the folder permission
It is very important to set the folder permission if you wish to open and use a secondary company file. Before you set it up, it is essential to verify that it is correct. You can do it with the help of the steps shared by the QuickBooks Support below:
- Open the Windows Start menu and go to the File Explorer
- Find and right-click the folder that has your company files
- Click on ‘Properties’ then Sharing and then go to ‘Share Add’
- Choose the parallel QBDataServiceUserXX as per your version
- Pick the permission level of both users to Full Control and select ‘Share’
They have not been set up correctly so you can simply dial the QuickBooks support phone number and you can also refer to these steps:
- Right-click the folder that has the company file and click on ‘Properties’
- Select Security, then proceed to ‘Edit’
- Choose ‘QBDataServiceUserXX’ and click on ‘Full Control’, then on ‘Allow’
- Select Apply, then go to ‘OK’
Step 3- Install the database server manager and open and use a secondary company file
Once you have downloaded QuickBooks desktop, the next step is to install it on the server computer. If you’re an accountant or someone who hosts numerous versions of QuickBooks Desktop on your network then install them in order. Install the oldest version first and then the most recent.
- Close all the open programs on your server system, including QuickBooks
- Open the install file you have downloaded which is called Setup_QuickBooks.exe
- Follow the instructions that you see on the screen.
- When QuickBooks asks you to choose an installation type, click on ‘Custom or Network Options’ and click on next
- Select the preferred option for your network setup and then choose ‘Next’. Both the options will be installing the Database Server Manager.
- QuickBooks Desktop has been already installed on your server computer then this won’t overwrite the current company data.
- You want Database Server Manager and QuickBooks Desktop on your server system, click on I’ll be using QuickBooks Desktop on this computer’.
- Follow the other instructions and select ‘Install’ when you are ready.
- Windows may ask you for permission.
Step 4- Set the admin rights
You have to make sure that the user account you are using to log in to your server computer has Windows admin rights. And Ensure that the Windows user account for Database Server Manager has admin rights as well.
Also Read:- QuickBooks Tool Hub Download & Install [Use to Fix Various Errors]
Step 5- Turn on the hosting
Now that you have set up everything outside of QuickBooks, all you need to do is switch on Multi-user Access on your server computer. Your server system will be the only computer with this feature on.
- Visit the File menu and take the mouse over ‘Utilities’ in QB Desktop.
- Click on ‘Host Multi-User Access’ and click on ‘Yes’ to confirm
You will be able to host your company files over your network.
Sign in as a user with admin rights on your server computer and workstations when you want to access your multi-user network.
However, when you open and use a secondary company file, you will face some restrictions on the primary file. They are listed below.
Also Read: Open and Use a Secondary Company File in QB
Accountant Menu:
- Manage Fixed Assets
- QuickBooks Statement Writer
- Export Balances to Lacerte Tax
- Export Balances to ProSeries tax
QuickBooks Services:
- Add any QuickBooks Add-ons
App Center:
- Install Intuit Partner Platform (IPP) applications
Intuit Data Sync (IDS):
- Set up, reset, or sync data
Internet Connection Setup:
- Select the internet connection from Windows Control Panel
Registration and Licensing:
- Register QuickBooks
- Sync license
- Change license
- Unlock to Premier
- Add seats
SDK Applications:
- Application that uses the QuickBooks Software Development Kit (SDK) to connect to QuickBooks
Tax Product Integration:
- Integrate with TurboTax, Lacerte, or ProSeries
Update QuickBooks Desktop:
- Download and update to QuickBooks.
Automatic Download has been turned on, the QuickBooks updates will be downloaded but not installed until you exit from both files.
The restrictions on the secondary file have been listed below:
Banking:
- Order checks and envelopes
- Set up account for Online Services
- Import Web Connect file
- Create Online Banking message
- Loan Manager
- Fix check reorder reminder
- Participating online institutions
- Learn about online bill payments
- Change Online Banking mode
Company Menu:
- Alerts Manager
- Customer Credit Card Protection
- Manage Currency
- Planning and Budgeting Tools
- Prepare Letters with Envelopes
Customer Center:
- The Collections Center
- These Credit Card Processing activities:
- Add Billing Solutions
- Inbuilt Credit Card Processing
- Put Electronic Check Processing
- Add Mobile Payment Processing
- Authorize/Capture Payments
- Download Fees
- Get Online Payments
- How to Process Credit Cards
- Link Payment Service to Company file
- Merchant Service Center
- Process Payments
- Record Merchant Service Deposits
- Set up Recurring Payments
Complex Passwords:
- Complex Password Setup for Credit Card Protection
Payroll:
- My Payroll Service (all items)
- Add, Edit, and Delete Payroll Items
- Create Termination Check
- Edit Filing Methods
- Edit Payment Due Dates/Methods
- Entering Time: Use Weekly Timesheets, Time/Enter Single Activity
- Excel: Client-Ready Payroll Reports
- Get Payroll Updates
- Pay Employees
- Process Payroll Forms, Edit/Void Paychecks
- Change New Employee Default
- Adjust Payroll Liabilities (Liability Adjustment) Settings
- Payroll Setup
- Set up Workers’ Comp
- Start Scheduled Payroll
- Word: Customize Letter Templates
- Workers’ Comp: List, Create/Edit Experience Modification Factor, New Workers Compensation Code
File Menu:
- All the items on the Import and Export sub-menus of the utility menu
- Convert
- Send Forms
- Ship FedEx Package
- Ship UPS Package
- Shipping Manager
- Shipping Settings
- Synchronize Contacts
- Track or Cancel a Shipment
- Update Web Services
Customize Design and Layout:
- Estimate
- Purchase Order
- Sales Order
- Invoice
- Sales Receipt
- Credit Memo
Template List:
- New
- Edit
- Delete
- Duplicate
- Active/Inactive
- Download
Conclusion-
We hope that now you know how to open and use a secondary company file and the restrictions that follow. If you need any assistance then feel free to dial the QuickBooks support phone number and the experts will help you to the best of their knowledge.