Crashing with a few or the other error is very normal, with regards to QuickBooks, as it includes huge algorithms and codes. On occasion, these errors can be effortlessly tackled by a simple reinstallation of the software. On the other hand, in a couple of cases, you might have to perform the complete clean installation process. This is where the QuickBooks clean install tool comes in the frame.
This article is there to brief you with the relevant information related to the QuickBooks clean install tool for Windows and also the perfect way on how to use it.
Learn about the QuickBooks clean install tool
QuickBooks is a versatile piece of software that produces a great deal of files and uses a lot of memory space on your device. QuickBooks Clean Install Tool saves you time by enabling you to entirely uninstall this application.
Assuming a QuickBooks desktop feature is obliterated or a fundamental restoration doesn’t fix the issue, you should initially remove QuickBooks Desktop for Windows and afterward rename the downloaded installation files prior to restoring the application. Both “Clean Install and Clean Uninstall” are the names given to this procedure.
Also Read:- Download And Install QuickBooks Desktop
Things to keep in mind before Clean Install QuickBooks
It is critical to get a QuickBooks PC download file or installation CD with the license number prior to executing the un-establishment process. Make a backup of the following procedures too, for good measure. Likewise, the devices on which you’re operating should be able to be restarted.
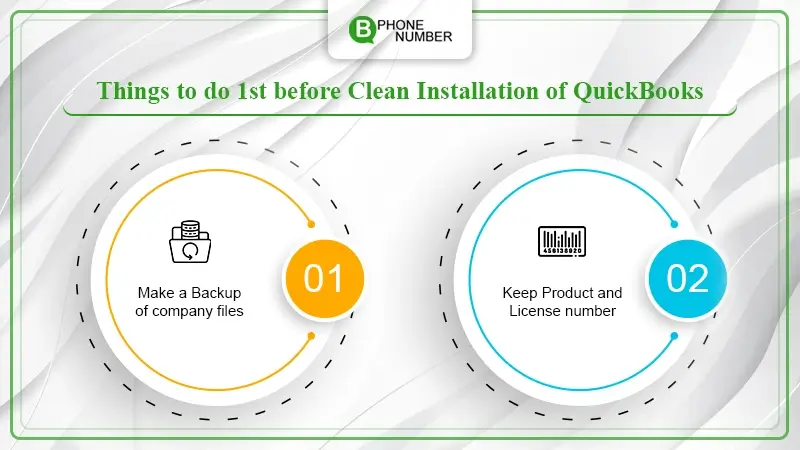
1. Backup company files:
- Start by bringing a backup flash drive into the machine.
- Now, open the QuickBooks Desktop application and make a backup of the company files.
- Then, Go to File and choose Back Up Company starting from the drop menu [this will create a local backup].
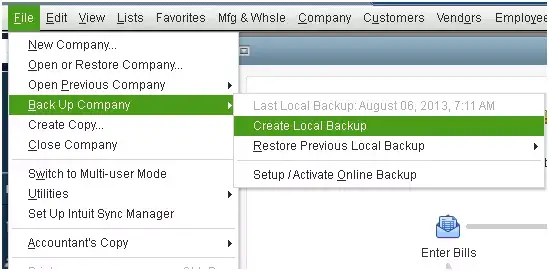
- Contingent upon your preferences, you might choose here between a local backup and an online backup. In any case, saving files on a Flash drive is secure on the grounds that it is a rapid way to transfer information back.
- Whenever that is done, hit Next and follow the on-screen directions to complete the backup.
2. Keep product and license number all these critical things in check:
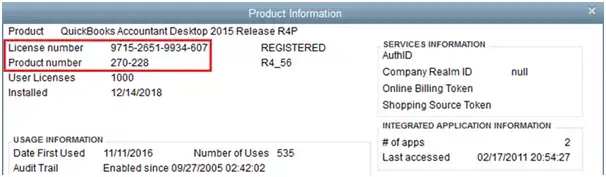
Once the QB software is uninstalled from the system you should have the Product and license number to log back in the software. In this way, guarantee it ahead of time that you have them. For this, essentially clear F2 key or Press CTRL+1 keys to open Product information.
Why QuickBooks removal tool must be used
To completely uninstall QuickBooks, you should utilize the QuickBooks Removal Tool. The following are some of the prevalent difficulties that need the use of the QuickBooks clean install tool.
- When trying to access several business files, an error occurs.
- Installation problems are displayed in QuickBooks.
- You couldn’t get away with frequent error codes with a basic QuickBooks reinstall.
Read More:- How to Integrate Shopify with QuickBooks? Complete Integration
How to install and utilize QuickBooks clean install tool for Windows?
To complete a re-installation of the QuickBooks Desktop, there are 3 steps that a user needs to finish. These are listed below:
Step 1: Uninstalling QuickBooks Desktop
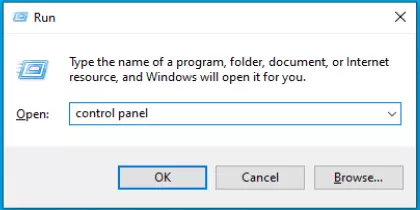
- To start with, you need to click Windows + R keys on the keyboard to open the RUN command
- Then type Control panel on the search bar, followed by clicking the OK button.
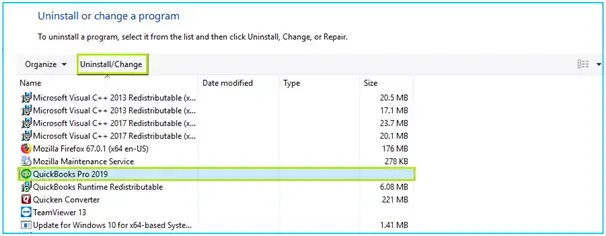
- Now, go to Programs and Features and then click on the option of Uninstall a Program.
- From the list of all the Software’s, tap on QuickBooks Desktop and choose Uninstall, follow the procedure to finish this step.
Step 2: Rename QuickBooks Installation Folders
Before starting the renaming of the QuickBooks installation folders for a complete uninstallation, ensure that your Windows system Hidden Items feature is enabled to show all the files. After that:
- Press Windows+E keys to access Windows File Manager.
- Now, go to the QuickBooks installation folder by the given location.
- C:\ ProgramData\ Intuit\ QuickBooks
- For 64-bit version C:\Program Files (x86)\Intuit\QuickBooks
- C:\Users\(current user)\AppData\Local\Intuit\QuickBooks
- C:\Program Files\Intuit\QuickBooks
- After locating, right-click on the QuickBooks folder and choose Rename option.
- Later, type OLD at the end of the folder name like QuickBooksFolder.OLD.
If you having a problem while renaming the folder then follow the given steps:
- Do a right-click on the Taskbar and choose Taskbar Manager.
- Then go to the Process tab and tap on the Image Name column o sort the processes alphabetically like A-Z or Z-A.
- Now, search and right-click on QBDBMgr.exe, QBCFMonitorService.exe, QBDBMgrN.exe, and Qbw32.exe files and click on the End Process button.
- When prompt “Warning; Ending any process can result in unwanted consequences, including system instability and data loss”, click OK.
- Lastly, try to rename the QuickBooks Installation folder again.
Also Check:- Fix QuickBooks Error 15241 [Payroll Not Update Successfully]
Step 3: Download, Install and Use QuickBooks Clean Install Tool for Windows
Follow the given steps to download and use the Clean Install QuickBooks program:
- Firstly, download the QuickBooks Tool Hub from Intuit’s official website.
- Now, go to the System’s Download folder and double-click on the Quickbookstoolhub.exe file to run the install
Note: When you download the file it automatically saves in the System’s Download folder.
- When the installation windows appear, click on Next.
- Here, check the Accept the License Agreement checkbox.
- After that, click on Next to choose an installation folder for the program.
- Now, follow the on-screen steps to complete the installation procedure.
- After that, go to the Desktop and double-click on the icon of the QuickBooks Tool Hub program.
- When the Tool Hub window opens, go to the Installation Issues tab and click on Clean Install Tool.
- Now, select the QuickBooks Desktop version and click Continue.
- When prompt “QuickBooks is now ready to install, Please install to the default location”, click OK.
- After the Clean Install is completed, process with a fresh QuickBooks installation.
How to Create QuickBooks Backup?
When you uninstall the QuickBooks Desktop, it is recommended to create a backup of all data to retrieve it at the time of installing the program again. Follow the steps for that:
- Sign in to your QuickBooks program with single-user mode.
Note: If you are already signed in and using multi-user mode then switch to single-user mode from the File menu.
- Choose the Back Up Company option beneath the File menu.
- Now, pick the Create Local Backup option and then Local Backup.
- Further, click on Options and choose a location to save the backup. We recommend storing the backup in an external hard drive like CD or you can save it online.
- Click OK and then the Next button.
- At last, select the Save It Now option and click on the Finish button to start the backup procedure.
Summing Up
Once you’re familiar with the steps outlined here, reinstalling QuickBooks for Windows using the QuickBooks Clean install tool is a piece of cake. It is believed that the QuickBooks desktop program works well now that we have a better understanding of how to use the QuickBooks Clean Install Tool.
When you want to know about the steps to use clean install QuickBooks for Windows, it is always considered to refer to the blog to know how to use QuickBooks clean install tool download for Windows.