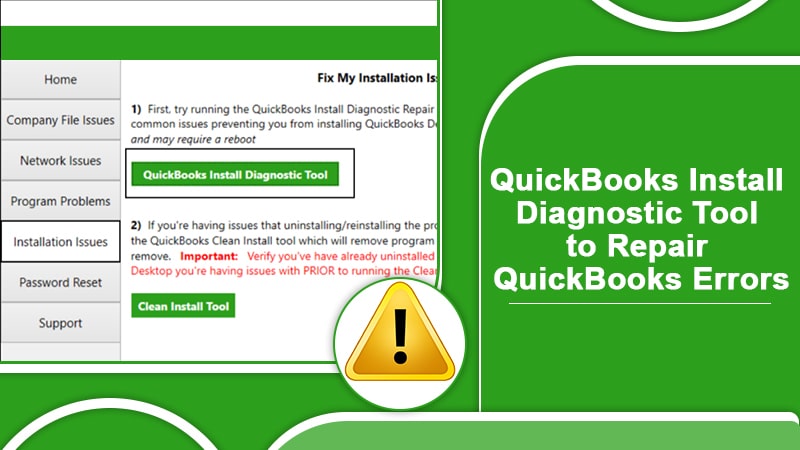
QuickBooks Install Diagnostic tool is a QuickBooks repair tool that automatically detects and resolves common problems with QuickBooks. It helps in repairing the issues that occur in C++, .NET framework, or the MSXML. When you face any technical issue with QuickBooks then first run the Diagnostic tool to fix the problem immediately.
This amazing tool is designed by intuit to handle entire installation-related errors within the QuickBooks software. This tool can help you to eliminate any sort of problem while performing installation, or while opening QB after the installation. So, let’s discuss more this QuickBooks tools in a brief manner.
Some Salient Benefits of QuickBooks Install Diagnostic Tool
Once you have installed the diagnostic tool into your system, the QuickBooks installation errors should be resolved automatically. The tool is also beneficial for fix QuickBooks error codes that are listed below:
| QuickBooks error 1603 | QuickBooks Error 1328 |
| C++ related errors | Error 3371 QuickBooks |
| MSXML damage | QuickBooks Error 1603 |
| NET Framework errors | Error 15215 QuickBooks |
| QuickBooks Error 15106 | QuickBooks Error 12029 |
| Unrecoverable error in QuickBooks | Error 61 QuickBooks |
| QuickBooks has stopped working | QuickBooks Error 12007 |
| Error 404 QuickBooks | QuickBooks Script Error |
READ ALSO:- How To Setup QuickBooks Remote Access? Complete Guide!
How to Download and Install the QuickBooks Install Diagnostic Tool?
You can download and install QuickBooks Install Diagnostic tool easily after following the steps below. Follow them carefully.
- Navigate to the Intuit website to download the tool.
- After the prompt appears, save the file of the QuickBooks install tool to the desktop.
- Exit all programs that are open on your computer.
- Navigate to the location of the download and search for the ‘exe‘ file of the tool.
- After locating the file, double-tap on the start installation wizard.
- Upon the appearance of the license agreement, tap ‘Yes.’
- Tap on ‘Proceed‘ to begin with the process of the scan.
- After its completion, start your system again.
- Launch the tool, you may have to once again register on your QuickBooks ID.
- Keep your Windows OS updated.
- Start your device again to save the changes.
How to Use QuickBooks Diagnostic tool?
Remember Below Points Before Using the QuickBooks Install Diagnostic Tool
You need to keep certain things in mind when use QuickBooks Install Diagnostic Tool. They are given below.
- Exit all running programs and tap on ‘File‘ for running the tool after you install it on the desktop.
- The tool will find and fix the problem automatically. However, at times, you may have to start your system again.
- If you get an error message that states ‘No errors were detected‘ it means that the problem is still unresolved.
You can use the tool very easily by adhering to the steps given below. Check them out one by one.
- Use the connection tab for seeing the general compatibility.
To check the system and assess it for QB compatibility, make use of the connection tab. You can also use it for setting up a new QB company data file.
- Authenticate the Firewall status
The diagnostic tool will aid you to find the bugs associated with the Firewall. You will get the information concerning the system Firewall. Use it for resolving the issues that you might face while installing QB.
- Explore the network connectivity
You can also use the QuickBooks Diagnostic tool to view your network connectivity. If there’s any problem with it, the installation will halt in between.
READ ALSO- A Comprehensive Guide to Using the QuickBooks File Doctor Tool
How to Fix Installation Errors with QB Install Diagnostic Tool
This tool can resolve various installation errors. By using it, you can benefit from an error-free and seamless QB installation.

Download the QB Tool Hub
The QuickBooks Tool Hub aids in resolving the prevalent installation error. To download it, follow these steps.
- Shut down the QB desktop.
- From the Intuit website, download QuickBooks Tool Hub.
- Save this file on your device and open it when it’s downloaded.
- Adhere to the commands onscreen to properly install it.
- Tap ‘Next‘ for agreeing to the terms and conditions.
- After the installation finishes, launch the Tool Hub by double-tapping on its icon.
Run the QuickBooks Install Diagnostic Tool with QB Tool Hub.
First, Download QB install diagnostic tool. After that run, the QB install the diagnostic tool using the QB Tool Hub. Follow these steps.
- Launch QuickBooks Tool Hub and search from the Windows search.
- Select ‘Installation Issues‘ in the QB tool hub.
- Select QuickBooks Install Diagnostic Tool. After you click on the QB install tool, it will automatically begin. Let it run.
- After the procedure finishes, reboot your device.
Update your Windows
You are also required to update Windows to the recent version. Restart the whole program after you update it. If QB begins with any error, then launch the company file and begin the work.
Use selective startup mode for installing QB desktop.
To install the QB desktop in this mode, prepare your data and launch the system in the ‘Selective startup mode.’ Here are the steps for starting the system in this mode.
- Launch ‘MSConfig‘ by searching for it.
- Select the ‘Selective startup.’ From the ‘General’ tab, load ‘System services.’
- Choose the ‘Services tab‘ then select ‘Hide all Microsoft services tab.’
- Click ‘Disable all.’
- Untick ‘Hide all Microsoft services’ then choose the checkbox of ‘windows installer.’
- Tap ‘OK.’
You see the QuickBooks update error again if Windows is not correctly updated. So, kindly follow the instructions above.
Also Read: QuickBooks Check Register
How to reinstall QB in selective startup mode
To reinstall QuickBooks in selective startup mode, press ‘Ctrl + R’ keys and input ‘MSConfig.’ Press ‘OK.’ Then do the following.
- Click the ‘Selective startup‘ option and then select ‘System services.’
- Select ‘Hide all MS.’ Click ‘Disable all.’
- Now click ‘Listing of services.’ See if you are an installer, just check if it is selected.
- If it’s not, then select the heading subsequent to it, clicking the ‘OK‘ tab.
- Navigate back to ‘Start‘ and restart your system.
- Now reinstall with the aid of a clean installation process.
See Also: QuickBooks Refresher Tool – Fix Common QuickBooks Errors
That is all, you needed to know about the QuickBooks Diagnostic tool. We hope you get some information about this tool from the above points. In any case, if you need more assistance to understand this tool, then you can make a call to contact experts who are accessible all day long. Here, you will get the proper information within a matter of time.
FAQ
Ans1. You can download the QuickBooks Install Diagnostic Tool for free by downloading the QuickBooks Tool Hub, go with the following:
1. Firstly, visit the Intuit QuickBooks official webpage.
2. Secondly, search for the QuickBooks Tool Hub’s latest version 1.5.0.0.
3. When the search completes and the download page opens, click on the Download button and save the file on the computer.
4. After that, go to the download Qbtoolhub.exe file location and right-click on the file, and choose the Run as Administrator option.
5. Now, follow the on-screen steps for completing the installation.
6. When the installation is complete, open the Tool Hub.
7. Lastly, use the Install Diagnostic Tool from the installation issues tab.
Ans2. To use the QuickBooks Install Diagnostic Tool, follow the given steps:
1. In the first step, open the QuickBooks Tool Hub application.
2. Then, choose the Installation Issues tab from the left.
3. Click on the Install Diagnostic Tool.
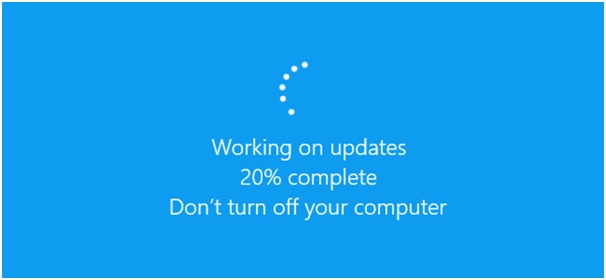
4. Let the tool run a scan, it can up to 20 minutes.
5. After the scan, open the QuickBooks Desktop.
Ans3. The QuickBooks error 1601, 1603, and 1642 are installation errors that can be fixed by using the QuickBooks Install Diagnostic Tool and performing a clean install. The Install Diagnostic Tool will these errors quickly, and with the clean install, you have to uninstall QuickBooks, remove installation folders, and then install the QuickBooks Desktop program again. What these errors are:
Error 1601: Access to Windows Installer is denied
Error 1603: Microsoft.NET Framework [version] installation encountered an error, resulting in error 1603.
Error 1603: An internal error was found by the update installation.
Error 1604: When installing QuickBooks, there was a problem installing the Microsoft.NET Framework.
Ans4. When the QuickBooks Install Diagnostic Tool does not work, then perform the given steps:
1. You should update your Windows to the latest release.
2. Update the QuickBooks Tool Hub to the latest version 1.5.0.0.
3. Temporarily disable the system antivirus.
4. Run the install QuickBooks Install Diagnostic with Admin rights.
5. Use the Install Diagnostic Tool in the selective startup mode.
6. Restart your computer.
7. Close all the running .exe tasks from the Task Manager.
8. Fix the Microsoft .NET Runtime Framework
Ans5. To repair the QuickBooks Desktop program, you can use the QuickBooks Install Diagnostic Tool for fixing the QuickBooks installation files and folders. QuickBooks program was damaged due to improper installation and incomplete installation files. To repair the QuickBooks Desktop:
1. Open the QuickBooks Tool Hub.
2. Go to the Installation issues and choose it.
3. Then, choose Install Diagnostic Tool.
4. The Tool will fix the issues and QuickBooks Desktop in 20 minutes.
Or you can use Quick Fix My Program.
1. Open the QuickBooks Tool Hub.
2. Click on Program Problems.
3. Click on Quick Fix My Program.
4. The tool will run a scan to fix the issues.
5. At last, open the QuickBooks Desktop.
Ans6. The QuickBooks Install Diagnostic Tool comes with so many benefits which help you in making the QuickBooks Desktop program error-free. The benefits:
1. It fixes the installation errors you face while installing QuickBooks.
2. It also resolves the update issue while updating QuickBooks to the latest update.
3. Makes the Windows system according to the QuickBooks Download and install.
4. Fixes the Microsoft .NET Framework and MSXML files that are essential for installing the QuickBooks Desktop program.
5. Completes the QuickBooks essential running files.
6. Helps in functioning the company file properly.